Hello World, How it works?

In the last tutorial we see how to create a basic hello World app, now in this we are going to see what we did there and try to understand how all this works for batter understanding.
What we are going to cover in this tutorial:
- Introduction to Xamarin Studio – Introduction to Xamarin Studio and creating a new application.
- User Interface (UI) – Creating user interfaces with the iOS Designer.
- View Controllers and the View Lifecycle – An introduction to the View Lifecycle and managing Content View Hierarchies with the View Controller.
Introduction to Xamarin Studio:
Xamarin Studio is a free, open-source IDE that combines features from Visual Studio and XCode. It features a fully integrated visual designer, a text editor complete with refactoring tools, an assembly browser, source code integration, and more. In this guide we’ll learn to use some basic Xamarin Studio features, but if you’re new to Xamarin Studio you will want tUser Interface:o check out the in-depth Introduction to Xamarin Studio.
User Interface:
As same as iOS Xcode Xamarin uses same User Interface builder Storyboard to develop GUI for user.
The iOS Designer is a visual tool for building user interfaces in Xamarin. We can launch the Designer by double-clicking on any Storyboard (.storyboard) file, which will open to a view that resembles the following screenshot:
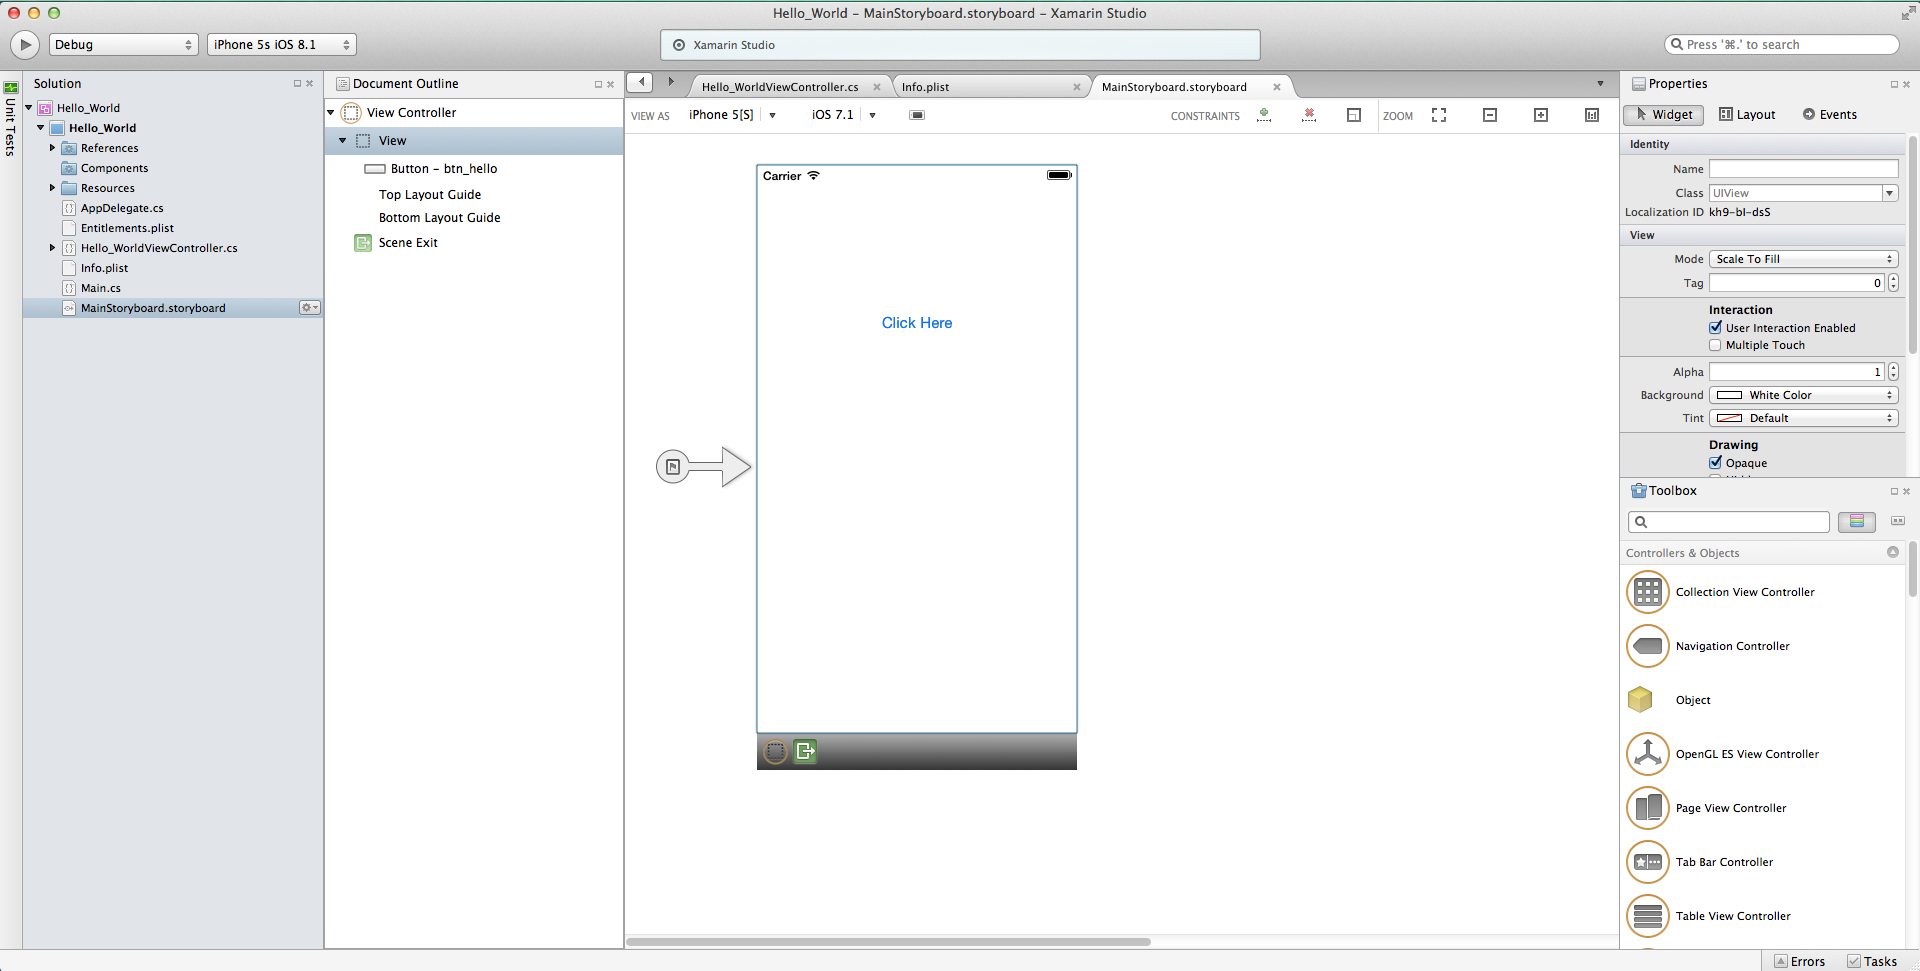
This storyboard is a file that contains visual design of your application’s all the screens and views as well as transitions and relationships between different screens of application.
View Controllers and the View Lifecycle:
Storyboard provides us user interface to display the controls and contents but what about interaction with these controls? For this we need a View Controllers file, View Controllers are used to manage View in Content hierarchy.
It contains code that gives power to interact with controls.
View Controllers and Storyboards:
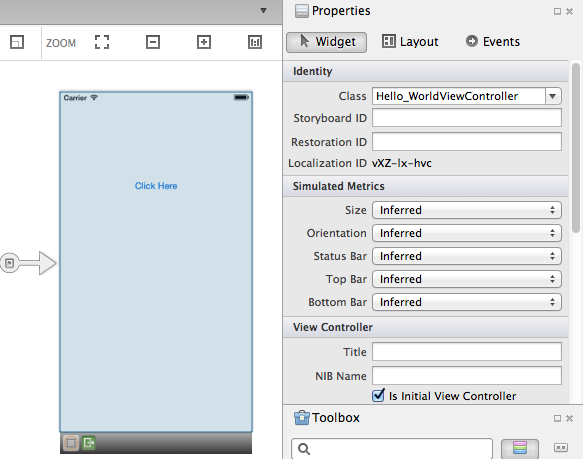
We can specify custom view controller class name for view controller by editing Class property in the identity section of properties pad. We have here Hello_WorldViewController.
This links the Storyboard representation of the View Controller to the Hello_WorldViewController C# class. If we open the Hello_WorldViewController.cs file, we see that our View Controller is a subclassof UIViewController, as illustrated by the code below:
|
1 2 3 4 5 6 |
public partial class Hello_WorldViewController : UIViewController { public Hello_WorldViewController (IntPtr handle) : base (handle) { } } |
The Hello_WorldViewController now drives the interactions of the Content View Hierarchy associated with this View Controller in the Storyboard. Next we’ll learn about the View Controller’s role in managing the Views by introducing a process called the View lifecycle.
View Lifecycle:
The View Controller is in charge of loading and unloading Content View Hierarchies from the Window. When something of importance happens to a View in the Content View Hierarchy, the operating system notifies the View Controller through events in the View lifecycle. By overriding methods in the View lifecycle, we can interact with the objects on the screen and create a dynamic, responsive user interface.
These are the basic lifecycle methods and their function:
- ViewDidLoad – Called once the first time the View Controller loads its Content View Hierarchy into memory. This is a good place to do initial setup because it is when Subviews first become available in code.
- ViewWillAppear – Called every time a View Controller’s View is about to be added to a Content View Hierarchy and appear on the screen.
- ViewWillDisappear – Called every time a View Controller’s View is about to be removed from a Content View Hierarchy and disappear from the screen. This lifecycle event is used for cleanup and saving state.
- ViewDidAppear and ViewDidDisappear – Called when a View gets added or removed from the Content View Hierarchy, respectively.
When we add custom code to any stage of the Lifecycle, we override that Lifecycle method’s base implementation. We tap into the existing Lifecycle method, which has some code already attached to it, and we extend it with our own code. We call the base implementation from inside our method to make sure the original code runs before our new code.
Responding to User Interaction:
When user interact with view controller like button presses, navigations, and more. The simplest way to handle user interaction is to wire up a control to listen to user input and attach an event handler to respond to the input.
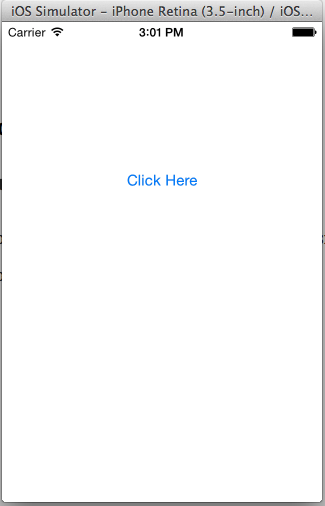
In our previous project we create a Click here button to prompt alertview.
When we assigned a Name to the Button control in the Properties Pad, the iOS designer automatically mapped it to a control in the Hello_WorldViewController.cs, making the btn_click available to us inside the Hello_WorldViewController class.
In the btn_click method
|
1 2 3 4 5 |
partial void btn_click (UIButton sender) { var av = new UIAlertView ("Hello","hello world",null, "OK",null); av.Show (); } |
I hope this gives you somewhat understanding of Xamarin iOS app development.
If you like this tutorial then you can download full copy of the code from github.
Leave a Reply