Hello World! Build your first Xamarin.Forms

Xamarin.Forms is a cross-platform natively backed UI toolkit abstraction that allows developers to easily create user interfaces that can be shared across Android, iOS, and Windows Phone. The user interfaces are rendered using the native controls of the target platform, allowing Xamarin.Forms applications to retain the appropriate look and feel for each platform.
Xamarin.Forms is implemented as a .NET Portable Class Library ( PCL), which makes it very easy to share the Xamarin.Forms API’s across a variety of platforms. The first step to getting started is to create a solution for the various projects that will make up the application.
A Xamarin.Forms solution can be created in Xamarin Studio or Visual Studio and will typically contain the following projects:
- Portable Library – This project is the cross platform application library that holds all of the shared code and share UI.
- Xamarin.Android Application – This project holds Android specific code and is the entry point for Android applications.
- Xamarin.iOS Application – This project holds iOS specific code and is the entry point for iOS applications.
- Windows Phone Application – This project holds the Windows Phone specific code and is the entry point for Windows Phone applications.
In this tutorial we are just going to see how to create Xamarin.Forms and try to understand its projects and working of important files.
Let’s Start:
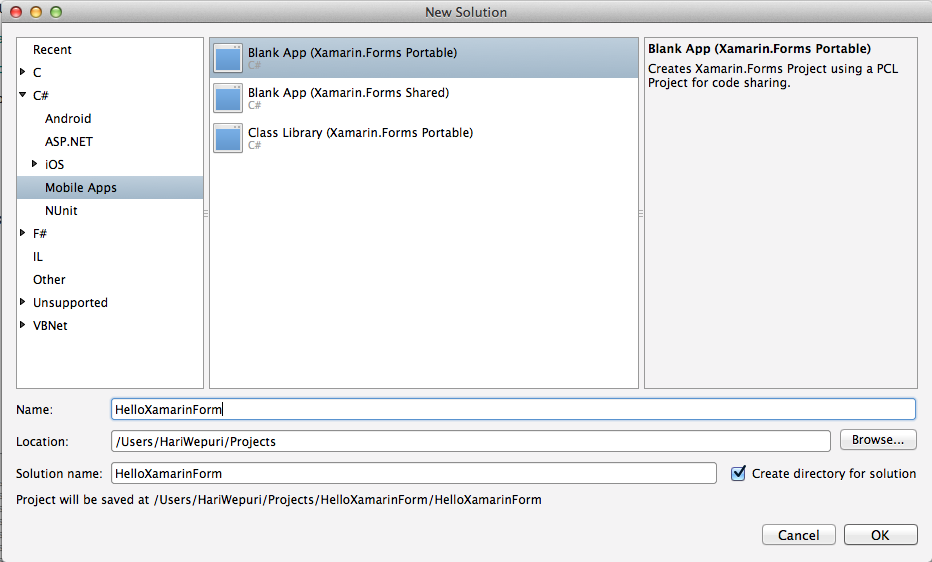
To create a Xamarin.Forms application we are going to create a new solution, go into Xamarin and New solution

Go into C#->Mobile Apps-> Blank XamarinApp(Xamarin.Forms Portable) and give name of solution as “HelloXamarinForm”
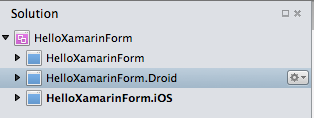
In Solution Tab you can see files for your iOS and Android and also a common project , for windows phone development you have to use Visual Studio with Xamarin.
Now go in HelloXamarinForm, you will find HelloXamarinForm.cs. Open the file:
|
1 2 3 4 5 6 7 8 9 10 11 12 13 14 15 16 17 18 19 20 |
namespace HelloXamarinForm { public class App : Application { public App () { // The root page of your application MainPage = new ContentPage { Content = new StackLayout { VerticalOptions = LayoutOptions.Center, Children = { new Label { XAlign = TextAlignment.Center, Text = "Welcome to Xamarin Forms!" } } } }; } } |
Here, App is the main class that is responsible to generate UI for Android and iOS.
-MainPage gets instance of ContentPage which is a type of Page in Xamarin.Xorms that is used to display content.
-StackLayout is a type of Linear layout that holds controls in it.
-Here we simply declare a Label to display text in our view, we can create a instance of label and use it in our view but that we are going to do latter in our tutorial.
We have a Android and a iOS project in our this solution. This App class is going to be used in that both plateform to load UI and backend code.
Go to HelloXamarinForm.Droid and open MainActivity.cs:
|
1 2 3 4 5 6 7 8 9 10 11 12 13 14 15 |
namespace HelloXamarinForm.Droid { [Activity (Label = "HelloXamarinForm.Droid", Icon = "@drawable/icon", MainLauncher = true, ConfigurationChanges = ConfigChanges.ScreenSize | ConfigChanges.Orientation)] public class MainActivity : global::Xamarin.Forms.Platform.Android.FormsApplicationActivity { protected override void OnCreate (Bundle bundle) { base.OnCreate (bundle); global::Xamarin.Forms.Forms.Init (this, bundle); LoadApplication (new App ()); } } } |
Here in LoadApplication method we create an instance of App that will initialize Xamarin.Forms framework, and then load your Xamarin.Forms application.
Now go to HelloXamarinForm.iOS project and open AppDelegate file:
|
1 2 3 4 5 6 7 8 9 10 11 12 13 14 15 |
namespace HelloXamarinForm.iOS { [Register ("AppDelegate")] public partial class AppDelegate : global::Xamarin.Forms.Platform.iOS.FormsApplicationDelegate { public override bool FinishedLaunching (UIApplication app, NSDictionary options) { global::Xamarin.Forms.Forms.Init (); LoadApplication (new App ()); return base.FinishedLaunching (app, options); } } } |
Here in AppDelegate file as same as Android we create a instance of App and initialize the Xamarin.Forms framework and start up the Xamarin.Forms application. This is done inside the FinishedLaunching method, as demonstrated in the code.
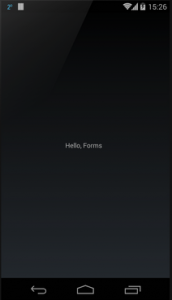
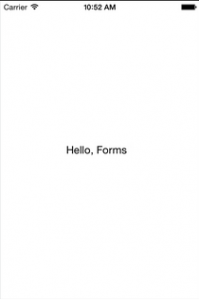
Try to build and run the app and you will see the application is run in both Android and iOS.
If you like this tutorial then you can download full copy of the code from github.
Leave a Reply