How to use Label,Button and Image in Xamarin.Forms

In our last tutorial we have seen how to create a Hello World app for basic understanding of XamarinForms.In this tutorial we are going to see some basic controls that we may need to create a functional app in real world.
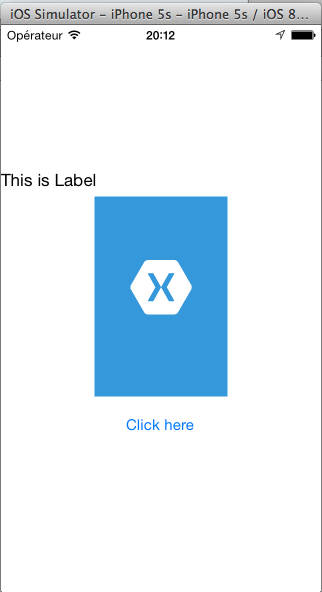
After we complete our tutorial it will look like this:
Let’s Start:
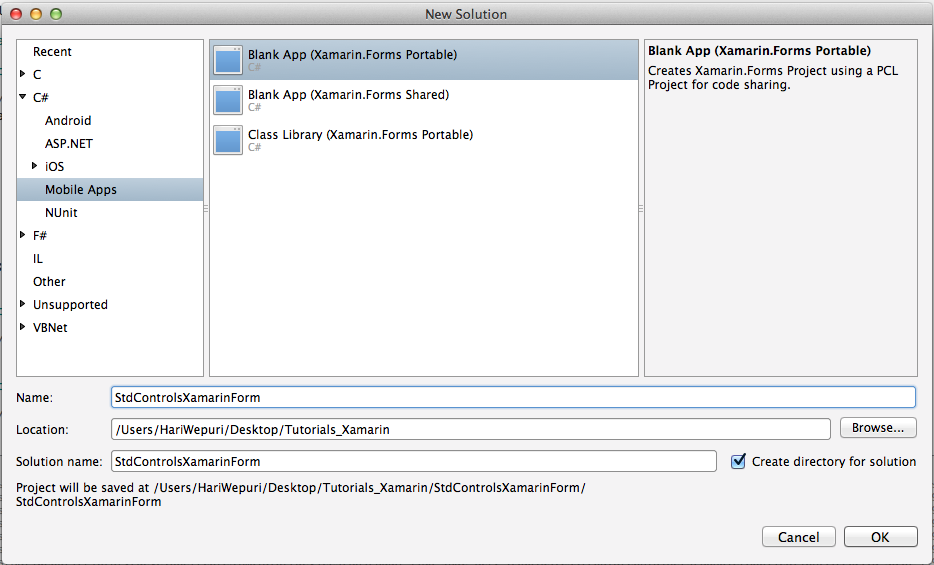
Create a new Solution and go to C#-> Mobile Apps -> Blank App (Xamarin.Forms Portable) and give name “StdControlsXamarinForm”.
Go to StdControlsXamarinForm.cs file and you will see code for Label , delete that code because we don’t need it.
Now in Constructor of App create object of a Label, Button and Image:
|
1 2 3 4 5 6 7 8 9 10 11 12 13 14 15 16 17 18 19 20 21 22 23 24 25 26 27 |
public class App : Application { public App () { Label lbl_name = new Label { Text = "This is Label", //VerticalOptions= }; Image img = new Image { Source="Default.png", HeightRequest=200, WidthRequest=200 }; Button btn_click = new Button { Text = "Click here" }; // The root page of your application MainPage = new ContentPage { Content = new StackLayout { VerticalOptions = LayoutOptions.Center, Children = { lbl_name, img,btn_click } } }; } } |
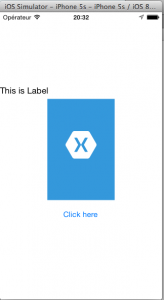
Here, we created a Label, Image and Button control to display in our tutorial app. Now try to build and run the app.
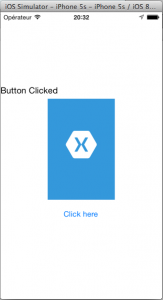
We’ve added a button but when you click on it, it will not do anything, because we didn’t handle it’s click event of button.
For that add this code:
|
1 2 3 |
btn_click.Clicked += (sender, e) => { lbl_name.Text="Button Clicked"; }; |
Now try to build and run the app, if you did everything right you will see your demo app like:
If you like this tutorial then you can download full copy of the code from github.
Leave a Reply