How to use MapView in Xamarin.Forms

Xamarin.Forms.Maps uses the native map APIs on each platform. This provides a fast, familiar maps experience for users, but means that some configuration steps are needed to adhere to each platforms specific API requirements. Once configured, the Map control works just like any other Xamarin.Forms element in common code.
Let’s started:
First of all create a new solution Name it MapViewXamamrinForms
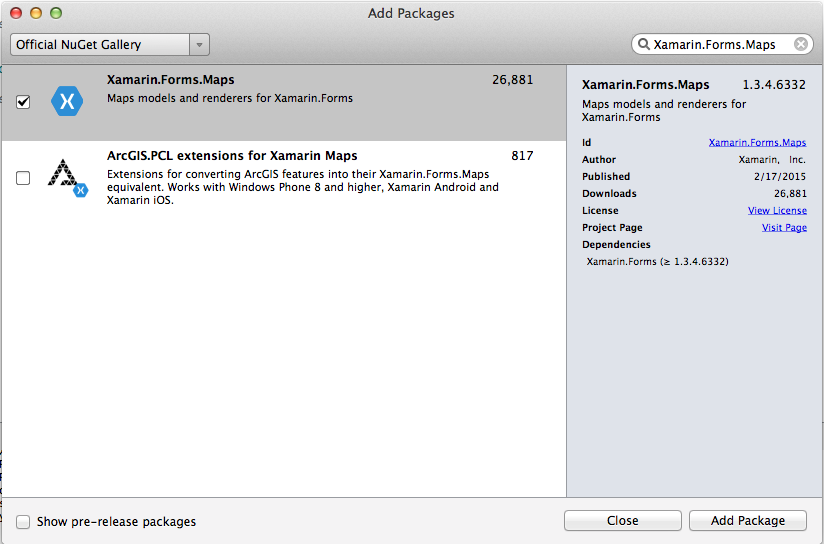
Now in solution we have 3 projects (for android, for ios and common) now we have to add package call Xamarin.Forms.Maps in all the 3 projects from Nuget packages and to add right click on Package and then select add package and then search or browse the package and select add Button.
Now we have to add Xamarin.FormsMaps.Init() after Xamarin.Forms.Forms.Init()
in
• iOS – AppDelegate.cs file, in the Finished Launching method.
• Android – MainActivity.cs file, in the OnCreate method.
Now Lets Start with IOS:
On ios7 it will work fine but for ios8 we have to add following plist in info.plist
|
1 2 3 4 |
<key>NSLocationAlwaysUsageDescription</key> <string>Can we use your location</string> <key>NSLocationWhenInUseUsageDescription</key> <string>We are using your location</string> |
Now we have to add Following code in our content page and do not forgot to define namespace using Xamarin.Forms.Maps
|
1 2 3 4 5 6 7 8 9 10 11 12 13 14 15 16 17 18 19 20 21 22 23 |
using System; using Xamarin.Forms.Maps; using Xamarin.Forms; namespace MapViewXamarinFroms { public class mapdemo : ContentPage { public mapdemo () { var map = new Map( MapSpan.FromCenterAndRadius( new Position(37,-122), Distance.FromMiles(0.3))) { IsShowingUser = true, HeightRequest = 100, WidthRequest = 960, VerticalOptions = LayoutOptions.FillAndExpand }; var stack = new StackLayout { Spacing = 0 }; stack.Children.Add(map); Content = stack; } } } |
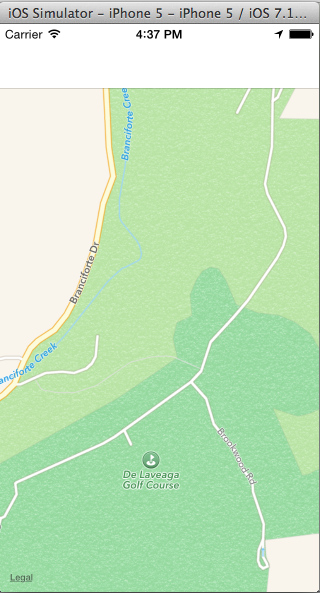
Now just build the project with ios and it will look like as follows
Now let’s start with android:
Map in android is takes some extra work then ios first of all we have to get ApiKey for the project and mention it in our AndroindMenifest.xaml file and to generate ApiKey first we have to generate SHA-1 Key using keytool and debug.Keystorfile for that start your terminal and move to
|
1 |
/System/Library/Java/JavaVirtualMachines/[VERSION].jdk/Contents/Home/bin/keytool |
and then execute following command in terminal
|
1 |
keytool-list -v -keystore/Users/[USERNAME]/.local/share/Xamarin/Mono\ for\ Android/debug.keystore-aliasandroiddebugkey-storepass android -keypass android |
It will show you SHA-1 Key just copy it and openGoogle APIs Console
Click on create new project and enter project name and project id and click on create once the project is created it will redirect you on project dashboard form there select Api&auth and from there just turn on Google Maps Android Api V2

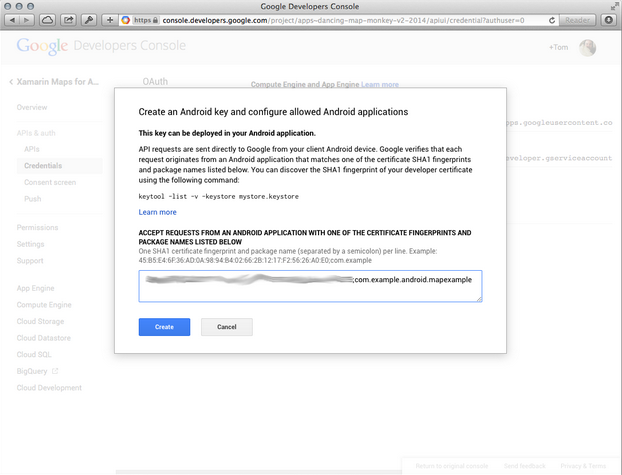
And then to Obtain Api key click on credential then click on create new key button and select android key now enter your SHA-1 key and then semicolon and your package name (ex: kfjhkjfhjkfh;pkg_name)

click on create and copy your ApiKey
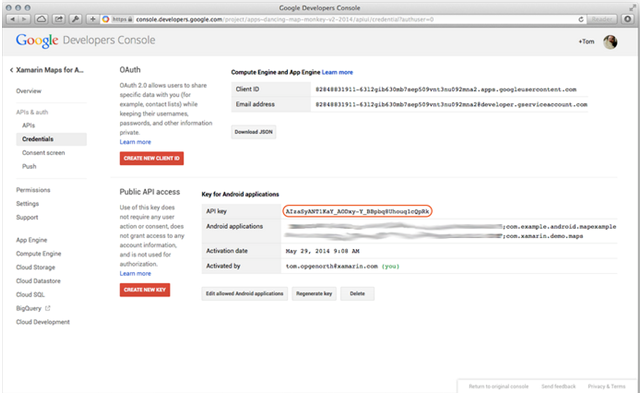
Now we have to add this api key and some permission to our AndroidMenifest.xml file
|
1 2 3 |
<meta-data android:name="com.google.android.maps.v2.API_KEY" android:value="bfgjkbghjkdglkglkglkgklg,n" /> <uses-permission android:name="android.permission.INTERNET" /> <uses-permission android:name="android.permission.ACCESS_NETWORK_STATE" /> |
Nowbuildyour android app and run it in simulator.
If you like this tutorial then you can download full copy of the code from github.
Leave a Reply